Pretty New Year! Bold lips & Neutral eyes

Pretty New Year to all of you!

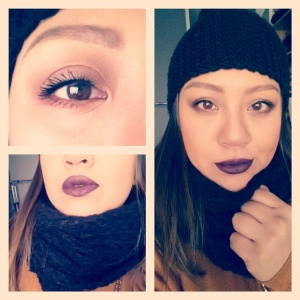
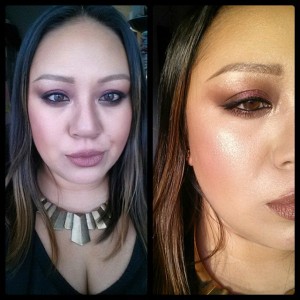
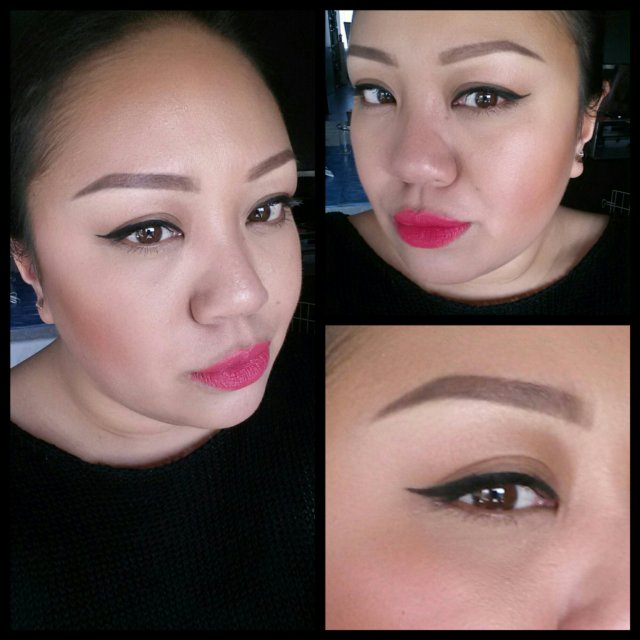
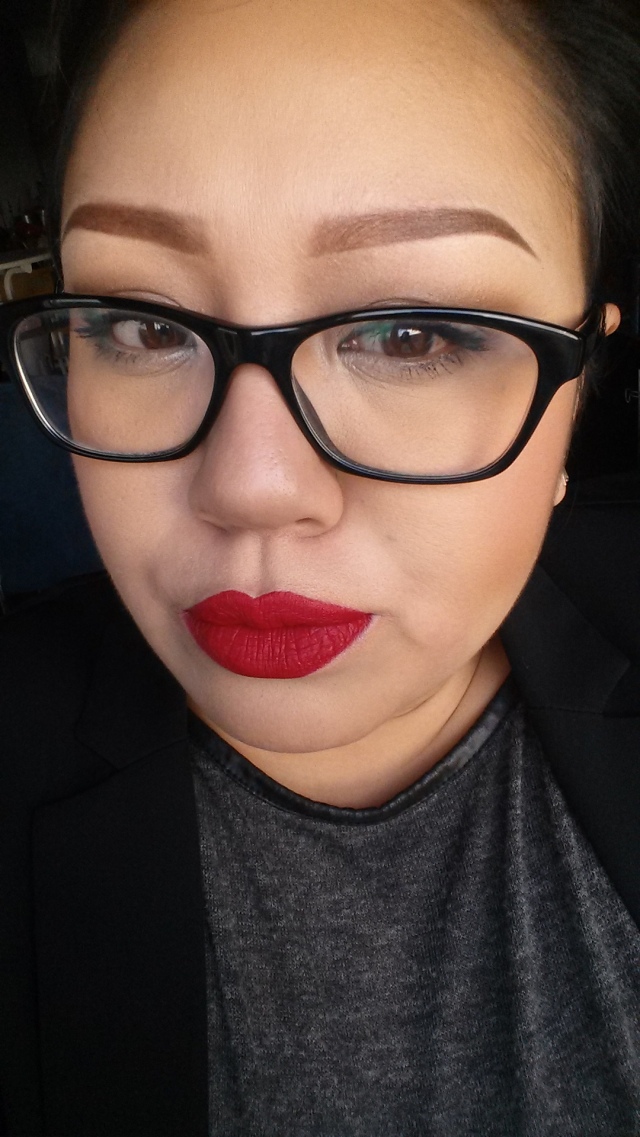
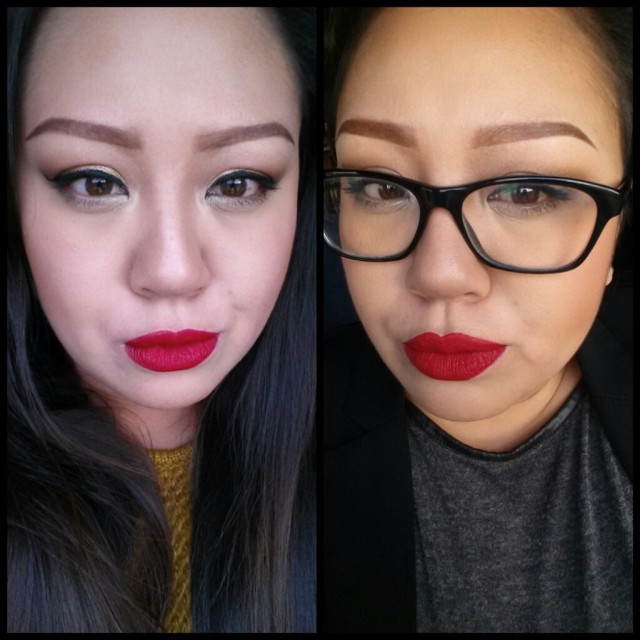
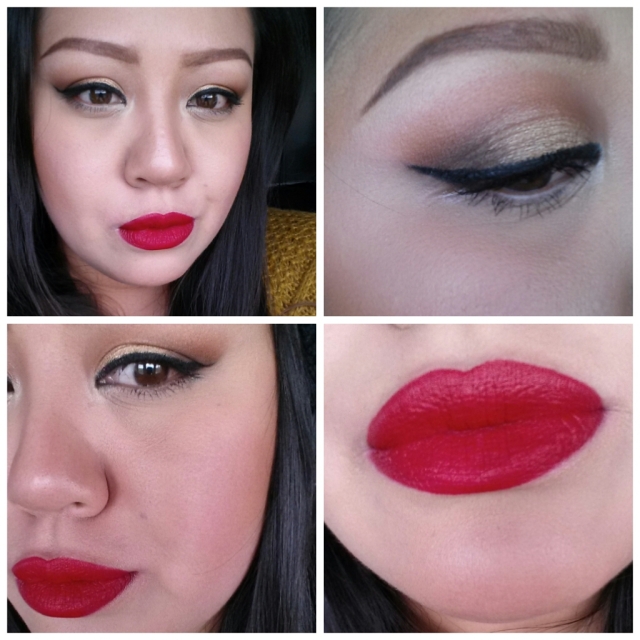
To start off the year (and 2015’s very 1st weekend) I chose to wear a bold lip and nude eyes. I met up with a few friends and went to the Foodhallen, a super duper food court located in Amsterdam West. Food, Friends & Fun 🙂

I posted this picture on my Instagram:

IMG_20150103_142650-1

and as promised you can find the list of products below. Of course, most of the products are from MAC, unless specified.

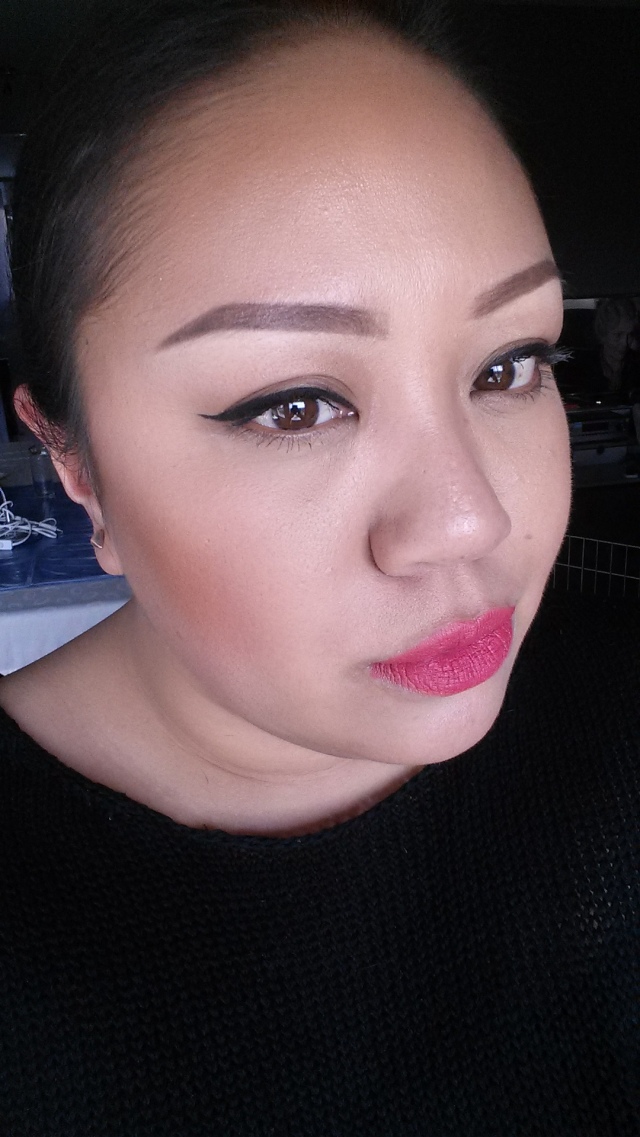
● FACE: Fix+, @benefitcosmetics Porefessional (on my T-zone), mixed @covergirl Outlast Stay Fabolous 3 in 1 foundation in nr. 857 (Golden Tan) and @lorealparisfr @lorealparisusa True Match foundation in W6, NW30 + NC35 concealer, NYX Stay Matte But Not Flat powder foundation, Kiko Perfect Glow Compact Foundation in nr. 12, Give me sun! on the cheeks.

● EYES: Soft Brown (above the crease), Saddle (crease), Swiss Chocolate (outer V), @rimmellondonuk Lash Accelerator mascara on top and bottom lashes, @maybelline Go! Colossal Extreme mascara on the top lashes (2X). I used the same eyeshadow colors to define the lower lashes.

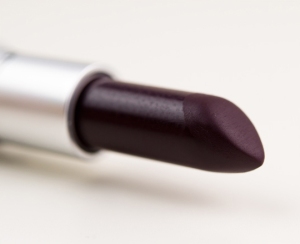
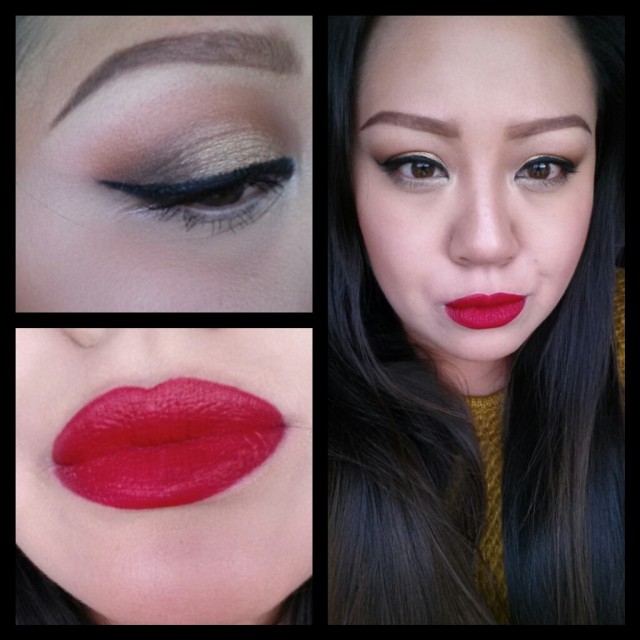
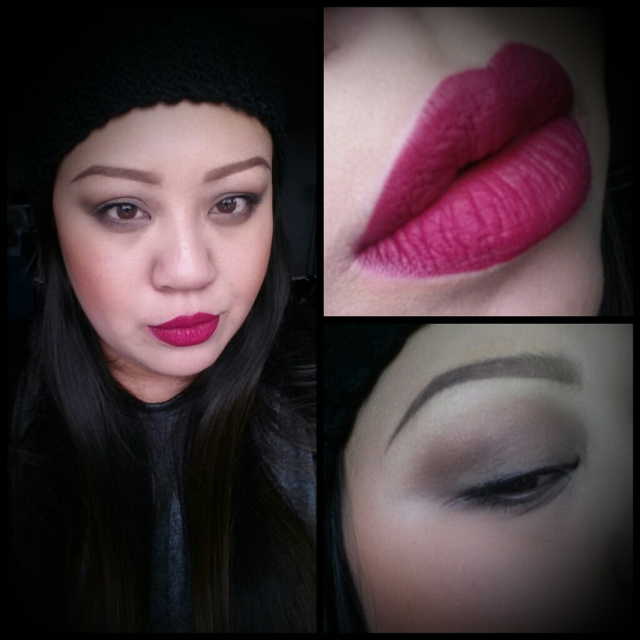
And, of course, the most important part of this look: I used MAC’s lip pencil in the color Vino and filled in the lips, then finished them up with Smoked Purple.

mac_smokedpurple001

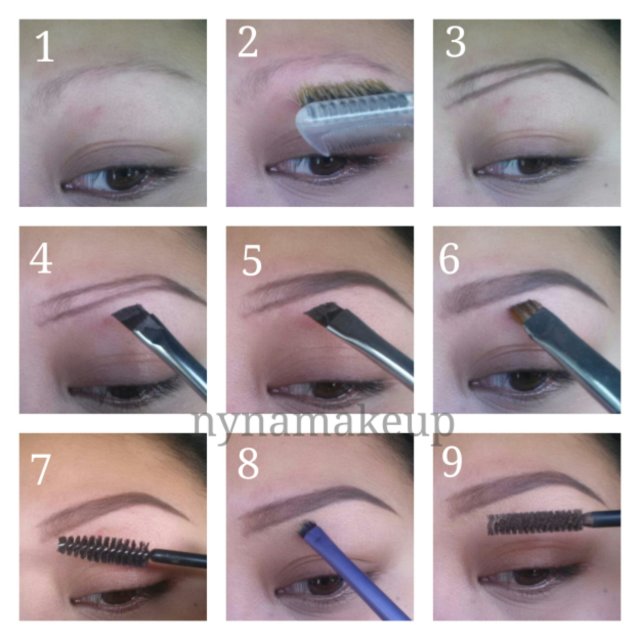
I defined my eyebrows with Anastasia Beverly Hills diprow pomade in Dark Brown. A lot of people ask me how I do my eyebrows, for those who know me I do not have many…anymore 😦 BUT I found a way to bring them back to life. I actually posted a pictorial about it, here is the link: https://nynamakeup.wordpress.com/2014/03/02/eyebrow-power-how-i-perfect-my-almost-non-existent-brows/


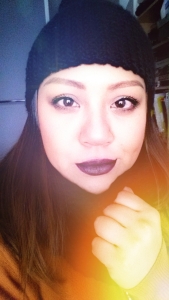
Here is my final look, with a tiny bit of editing due to the horrible lights:

PicsArt_1420317160142-1

Even if I L-O-V-E my eyeshadows and I absolutely adore wearing heavy eye make-up, this kind of make-up is so much easier to do and can easily be adapted to anybody. If you do not feel like wearing such a dark lip color, go for a red. If you are still scared of bright colors, you can opt for a nude/pink/mauve lipstick.

Simplicity is your best friend 🙂

xoxo, -S.-

Heritage Rouge Christmas

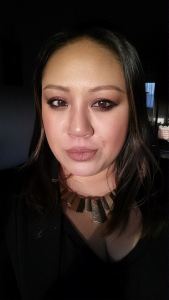
Happy Holidays everyone! Here is the look I was wearing on Christmas Eve (apologies for the lights, pics were taken in different parts of my house):

XmasEveNYNA

Here is the list of products I used, mostly MAC Cosmetics.

● FACE:

– MAC Fix+

– Clinique City Block Sheer

– Benefit Porefessional

– MAC Face&Body Foundation in C5

– MAC Studio Finish concealer in NW30 and NC35

– Ben Nye Banana luxury powder all over the face

– Kiko Perfect Glow Compact Foundation in nr. 12 to contour

– MAC blush in Pinch Me

– MAC e/s in All That Glitters to highlight the cheeks.


● EYES:

– MAC Painterly paint pot above the crease

– MAC Quite Natural paint pot on the lid

– MAC pigment in Heritage Rouge on the lid

– MAC Embark in the outer V

– MAC Saddle in the crease

– MAC Soft Brown above the crease

– MAC Ricepaper on the browbone

– MAC All That Glitters in the inner tearducts

– Inglot gel liner in nr. 77

– Anastasia Beverly Hills Dipbrow pomade in Dark Brown for my eyebrows

– Rimmel Lash Accelerator mascara on top and bottom lashes

– Maybelline Go! Colossal Extreme mascara on the top lashes only.


● LIPS:

– MAC lip pencil in Spice all over the lips

– MAC Half Red only on the top and bottom outer line (this will make your lips look plumper)

– Inglot lipstick in color 405 (matte)

So here is the finished look with the detailed eye and face:

10881698_812179332161051_2464144928662311654_n

Hope you liked it and please drop your requests in the comment box below, if you want to see more looks 🙂

And for the Social Media freaks, you can contact me also on

FACEBOOK / TWITTER / INSTAGRAM: NYNAmakeup

xoxo, -S.-

Winged liner & bold lip: welcome spring!

Upon request here is the list of products I used on yesterday’s look I posted on Instagram:

image

Face:

– MAC Prolongwear concealer in NW35 and NC35 (undereye area, between the brows, below the hollows of the cheeks and on my chin);
– MAC Cream Color Base in Midtone Sepia (hollows of the cheeks, jawline, temples and hairline);
– Yves Saint Laurent Touche Eclat in the color Beige (slightly too pink for me!);
– MAC Select Pressed Sheer powder in NC40;
– Anastasia Beverly Hills Dipbrow Pomade in Dark brown;
– MAC Studio finish concealer in NC35 to clean up the edges of my brows;
– MAC MSF in Give me sun! in the hollows of my cheeks;
– MAC blush in Pinch Me.

Eyes:
– Ingot gel liner in #77;
– Makeup Studio 4D mascara.

Lips:
– MAC lip eraser in Dim;
– MAC lip pencil in Lasting Sensation;
– MAC Retro matte lipstick in Relentlessly Red

You just need some black eyeliner and a bold lip to make a statement!

image

Enjoy spring!!!

xoxo, – S. –

Eyebrow power: how I perfect my (almost non-existent) brows

I am back with a pictorial I know a lot of girls I know will definitely appreciate.

But first, a little introduction is needed. When I was younger I had squared and thick brows, with quite sparse hairs. As I turned 15, I decided it was timw to fix them and that’s when I started plucking them. I reached a point where I only had a very thin line instead of an eyebrow…even my mother was horrified and she would keep saying I should stop otherwise I would ruin them forever.
Back then I did not listen to her advise and just kept plucking any new hair.
As I got into make-up (I was 26) I had to face the eyebrow issue. I would watch any tutorial on YouTube trying to find something that would work for me.
I would use powder products and pencils at first, but I soon found out any of those would make me achieve the effect I wanted. So I walked into the MAC store one day and I asked this girl how she did her eyebrows, and she suggested MAC’s gel liner in Dipbrown. I tried many different techniques and the one that follows is THE only one that makes my brows look picture perfect without making them look fake.

I do not believe in the 3 point techniques because everyone has different eye shapes and I feel it is not applicable to everybody.
What I would suggest to those who still haven’t found their perfect shape yet, just sit down and try different looks. Eyebrows are the frames of our face and their shape really changes our features drastically.

In regards to products, there are so many different ones on the market. Girls with thick eyebrows would go very well with brow gels as they are basicllay giving a slight color and also keep the hairs in place.
Pencils and powders are suitable for those who have regular brows, nothing too dramatic. As of me, I find that the cream/gel in a jar option is the best. Having sparse and thin brows, I feel that this kind of gel (mind: not the brow gel!) covers any bald spot because of its pigmentation and I honestly find it much easier to apply and blend.

Anyways here is the pictorial, I hope you find this helpful and please don’t try and follow the exact shape I created for myself. Find your perfect shape first and pick up some of the tips I am going to give here:

image

1 and 2: after your skincare, use a brush to smooth out your canvas;

3 and 4: using my new Anastasia Beverly Hills Dipbrow Pomade (I use the color Deep Brown) and my MAC 263 brush I trace the outline of my eyebrow.
You can try using any gel liner that you have, but make sure the color is right. The eyebrow color should be as close as your root hair color as possible.

5: I then fill in the brow leaving the first 1/3 clean and color free, and trying to give a gradient effect as I get to the tail. You want the end of the brow slightly darker.

6: take a thick angled brush, and use it to blend the color in from the 2nd third to the tail. Once you’re done, use whatever is left on the brush to fill in the first third, which we had left blank earlier.

7: using a clean mascara wand, gently brush your lashes so that the color evens out better.

8: take some cream concealer and apply it along the lower part of your brow with a small concealer brush to make it look super sharp. Apply it on the outline of the tail if needed.

If you think your eyebrows look bad just save this link in your bookmarks and look at the top left picture!

Two days of red – Day 2: NARS Dragon Girl

So sorry I should have posted this last Sunday but I didn’t have any time since then. Anyways here is how it progressed:

image

I wore this color for a total of 10 hours.
This is how it looked right after application:
image

Dragon Girl is a beautiful matte blue-based red. It looks great on its own, matched with mascara and a swipe of blush, or with a cat eye. It feels very soft on the lips, and it is very easy to apply; the first thing I noticed though was that it is quite hard to get a sharp line around the lips, so that’s why I applied a red lippencil first (MAC Cherry). This is due to its size and round edge, which does make it harder to draw straight lines.
This color is quite similar to Ruby Woo, but the latter is more intense and darker too.
Among the pros, besides being easy to apply, is the fact that its formula is not drying at all. This is definitely a plus when it comes to matte lipsticks. Just make sure that your lips are well moistured before applying it.

During the day I had lunch with a friend of mine and had a chicken sandwich with some bacon in it. Before leaving the cafe I noticed that the lipstick bled outside the lines and some of the color swept away, so I actually had to reapply both the lippencil and lipstick, and also redefined my lips with concealer.

Around 9 p.m. I had dinner and again the color faded away (see 3rd picture).

So overall Dragon Girl is a beautiful color, looks good on my type of skintone (NC37, as a reference) and I doesn’t dehydrate the skin. However, it does smudge if you are not careful with food/drinks.

So who is the winner?

Check out my Instagram to find out!

image

Let me know if you want more challenges!

Love,

xoxo, – S. –

Two days of red – Day 1: MAC Ruby Woo

As mentioned last week, I wanted to do a few comparisons between products from two different make-up companies.

Because you know how much I love red lipstick, I decided my 1st smackdown would be

MAC Ruby Woo vs. NARS Dragon Girl

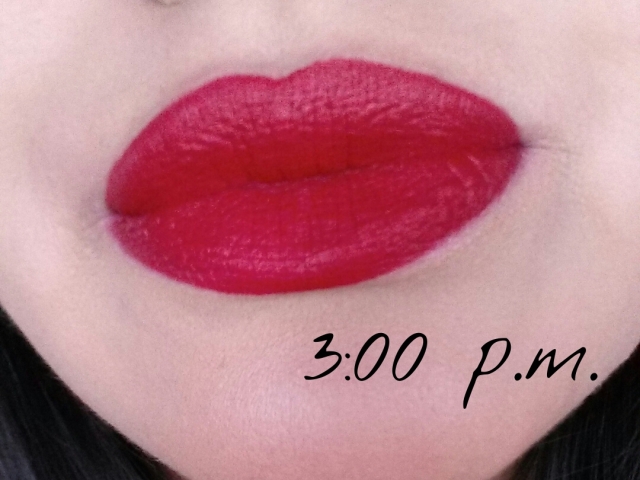
So today I wore Ruby Woo from 3 p.m. and did not retouch it or reapplied ever since then (midnight has passed now). Here is how it looked like right after I applied it:

image

I went to the city, had a latte in town, came home and had dinner around 9 p.m..

Before I get down to the result of this “Ruby Woo” day, let me tell you that this lipstick has been my holy grail for years. I have never, ever seen a lipstick more beautiful than this one before. It is perfect for my skintone and sometimes, especially on my lazy days, I literally just do my eyebrows, mascara and put on some of this and voila’!

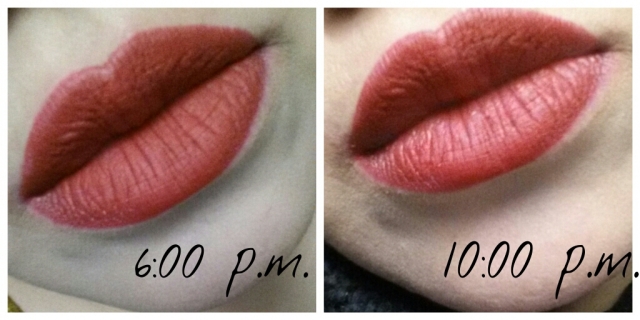
So here are two pictures I took after I came home. The one on the left was taken just as I came back home, whereas the one on the right was taken after dinner:image

Sorry for the huge difference in lights, but obviously the very 1st picture was taken with natural light and the two pictures above with artificial light. In none of the pictures I used flash.

Ruby Woo is a beautiful blue-toned red with a matte finish. It is definitely the most longlasting lipstick I have ever owner, however if you do decide to purchase it you have to know that it tends to try up your lips quite a bit.

What I do to avoid my lips to get too dry is to prep my lips at least 1 hour before applying this or any lipstick. I only use two products which are both very affordable:

  1. Lush Lipscrub “Mint Julips
  2. Labello Hydro Care

First off, massage your lips with the lipscrub for about 5 minutes. This will help scrubbing off the dead skin (yeah I know it sounds gross) and make your lips smooth – plus this one from Lush tastes like mint chocolate! Definitely a keeper! Then, I apply the lip balm and do the my make-up while it sents into the skin.

It is now half past midnight and Ruby Woo still looks great! The color intensity did change during the day, however considering I had a latte and dinner it is not bad at all. It does take really greasy food for this lipstick to go away and that is a plus.

Overall I love the longevity of this product and would definitely recommend it to those who are already familiar with reds and want to own this classic lipstick. If you want to keep the same intensity throughout the day I think re-application can be done after 5-6 hours or more. I wear Ruby Woo in the office and I never have to re-apply it, not even after long days (9-10 hours). At least on my lips, because they tend to get dry quite fast and especially in the outer corners, this is the area where most of the time the product fades away (even if on the rest of my lips it is still showing in full effect).

Tomorrow I will do the same with Dragon Girl by NARS and will announce the “winner”.

I hope you liked this post…see you soon!

xoxo, -S.-

Warm browns & red lips on a Saturday

If you follow me on Instagram, you know that I now post my “Look of the day” picture/collage and post the list of products on the blog, so here below is today’s look:image

Today I chose for warm brown eyes paired with a bold red lip. And you know which red I always go for: MAC Ruby Woo!!!

And here is the list of products:

FACE:

  • Benefit Porefessional on my T-zone only
  • Garnier Roll-on Anti-dark circles
  • MAC Pro Longwear Foundation in NC37
  • MAC Medium concealer palette – I used the mid-yellow color for my dark circles and NC35 mixed with NC30 for my undereye area
  • Ben Nye Banana Luxury powder to set everything
  • MAC Blush in Taupe to contour my nose
  • MAC MSF in Give Me Sun!
  • MAC Blush in Pinch Me

EYES:

  • MAC Soft Ochre paintpot on the lid, browbone and lower lashline
  • MAC Texture above my crease
  • MAC Swiss Chocolate in the crease
  • MAC Woodwinked all over the lid (with MAC Fix Plus)
  • MAC Embark in the outer V
  • MAC Brule’ on my browbone
  • MAC Ricepaper in the inner tearducts
  • MAC gel liner in Dipdown for the brows
  • Inglot Gel Liner in nr. 77
  • Essence mascara Lashmania Reloaded (two coats for the upper lashes, one coat for my lower lashes)

LIPS:

  • MAC liperaser in Dim
  • MAC lippencil in Cherry
  • MAC Ruby Woo
  • MAC Studio Finish to define the outlines

I also decided it would be nice to add the list of the brushes I used, so here it is:

  • Real Techniques Face Expert brush – foundation and powder all over my face
  • Real Techniques Setting Brush for under my eyes
  • Real Techniques Contour Brush
  • Real Techniques Blush Brush
  • MAC 263 for my eyebrows
  • Real Techniques Silicone Liner Brush *NEW*
  • Bdellium Tools brush nr. 277 (flat shader brush) to apply Woodwinked
  • Real Techniques Deluxe Crease Brush to apply Texture
  • Real Techniques Base Shadow Brush to apply Swiss Chocolate and Embark
  • Sigma P82 to contour my nose

If you wanna see more, here is the link to my Instagram account:

NyNamakeup

And the picture I posted today:

image

For questions and inquiries just leave a comment below!

Stay tuned for the celebrity lipstick smackdown aka “Two days of red”!!!

Enjoy the rest of the weekend!

xoxo, -S.-

Neutral eye & bold lips (for a lazy Sunday)

Hello hello!

I didn’t have time to post this before now, but here is the look I created yesterday:

image

Apologies for my dark and puffy eyes, but I couldn’t catch much sleep last weekend!

Face:
Benefit Porefessional
MAC Pro Longwear Foundation in NC37
Maybelline Fit Me concealer in nr. 25
Ben Nye Banana Luxury powder
MAC MSF in Give Me Sun!
MAC Blush in Eternal Sun

Eyes:
MAC Soft Ochre paintpot
Make Up Forever in nr. 98 all over the lid and in the crease
MAC gel liner in Dipdown for the brows
Essence mascara Lashmania Reloaded

Lips:
MAC liperaser in Dim
MAC lippencil in Beet
MAC lipstick in All Fired Up

I hope I can catch some sleep these days…see you soon!

Love

xoxo, -S.-

Warm brown smokey eyes with a hint of green

It’s weekend again!
I wanted to go kind of dark today so I decided to go for an intense brown smokey eye and added a little twist to it with some green.

Here is the look of the day:

image

Face:
MAC fix plus (right after my skincare)
Benefit Porefessional in my T-zone
MAC Pro Longwear Foundation in NC37
Maybelline Fit Me concealer in nr. 25
Ben Nye Banana Luxury powder
MAC MSF in Sun Power to contour
MAC blush in Eternal Sun
MAC blush in Taupe to contour my nose

Eyes:
MAC Soft Ochre paintpot
MAC Wedge above the crease
MAC Swiss Chocolate in the crease
MAC Brun in the outer V and in the inner corner of the lid
MAC Club in the center of the lid
Inglot Gel Liner nr. 77
MAC eyepencil in Feline dipped into Inglot’s gel liner in the waterline
MAC Club again on my lower lashline
MAC Vanilla pigment in the tearducts
Essence Lashmania Reloaded mascara (top and bottom lashes)
MAC Dipdown (gel liner) for my eyebrows

Lips:

• Daytime: MAC Kinda Sexy lipstick + Essence gloss nr. 19
• Evening: MAC lip eraser in Dim, MAC lip pencil in Currant, MAC lipstick in Sin

I hope you like it!

xoxo, -S.-

Haul: MAC, Inglot, Anastasia, Nars

Actually in 10 days I managed to purchase make-up from 6 different places (shops/websites):

– Sephora (French website, because it ships to the Netherlands);

– Boozyshop;

– Cherry Culture;

– MAC Cosmetics Pro Store (in Amsterdam…what’s new?);

– Douglas;

– Inglot (in Amersfoort)

I can’t make a review of all the products I purchased because I am still awaiting some orders, so I made a selection of what I bought and tried.

MAC Pro Longwear Foundation in NC37 + MAC Select Sheer Powder in NC40:

I’ve had a few issues with foundation since last year, because not only my skintone changes between summer and winter, but also between months.

I used NC35, then switched to Face & Body in C5, then during the spring of2013 I changedto NW35, then in the summer to NC45. Seriously, all medium-dark shades with both pink and yellow undertone.

During the fall of 2013 I used NW35 again and it seemed to be fine, but now that we are in the middle of the winter season, my skintone has shifted to a neutral undertone. I didn’t really have a foundation that would match my now “pale” skin, so I went to the MAC Pro Store and asked for advice. They wiped off my make-up, put the new products on, and when I looked in the mirror I was wowed by the result. I was then shocked when I was told they used NC37 and the powder in NC40.

Even if numerically NC37 should be darker than NW35 I got a very clear explanation for it. First of all, besides the different undertone, NC37 has a slight tint of pink which is the main factor that finally made it a picture perfect.

Check the picture below:

on the left side I was wearing NC37 and on the right NW35. In the last picture there was a flash so my face was actually a bit darker, but it still gives you the idea of how big the difference was.

During winter my skin tends to be dryer especially on the cheeks and on the sides of the nose, and because of that this foundation tends to highlight those spots. Besides this downside, I love how I finally was able to find a color that matches me! I will see in a couple of months which shade I will have to choose.

MAC’s Pro Longwear foundation has medium coverage, and I find it good for combination skin. I would not recommend it to people with very dry or very oily skin though. I luckily do not have skin issues except for some redness in my cheeks area, so I would say this is more suitable for people without huge skin issues such as acne or heavy breakouts.

NARS Velvet Lip Matte Pencil in Dragon Girl:

I fell in love with this product when I saw it for the 1st time on someone’s board on Pinterest and I have been craving for it for almost a year. Finally, I decided to purchase it.

I tried it only once but because I was not sure of how he color would stay on the lips I did use MAC Cherry lippencil under it.

The formula is very creamy, the pigmentation is good but it does bleed if you are not careful; make sure you always use a lipliner underneath! What I also realized is that you do have to reapply it after 4-5 hours as the color tends to fade. On the bright side, this lip pencil does not dry your lips (unline Ruby Woo by MAC).

Overall I would say this product is good but not as good as I expected. If you want a bright, blue-toned red, and you don’t know which one to choose, then you should definitely go for Ruby Woo.

Inglot eyeshadows in nr. 08, 335 and 337 +Gel Liners in nr. 77 and 90

Like I always said, Inglot has very good powder products, but when it comes to liquid or creamy ones I have always been sceptical about it (I have a very bad experience with an Inglot foundation that I tried years ago).

I own a few Inglot eyeshadows and I have always been extremely satisfied with their pigmentation and color pay-off.

Yesterday I bought 3 colors: nr. 08 which is a champagne shimmery eyeshadow, 335 which is a very warm brown (it kind of reminds me of MAC’s Saddle eyeshadow) and 337 which is a deep purple color. I will try to come up with a look to show you guys.

I also bought two gel liners, the black one (nr. 77) and a dark brown one (nr. 90). I have been devoted to my MAC Blacktrack gel liner for almost 2 years but I have to say Inglot does beat it. It is without a doubt the blackest black gel liner I have ever tried – I read reviews and watched Youtube tutorials and a lot of gurus have the same opinion. I know you shouldn’t do it, but try it also in the waterline by dipping a black kajal pencil (YES, pencil!) into the jar…you will be amazed by the result! (check my previous post https://nynamakeup.wordpress.com/2014/02/02/weeks-highlight-my-favorite-two-looks-from-my-instagram-nynamakeup/ the 2nd picture and you will be able to see what I mean)

Anastasia Beverly Hills Browwiz pencil in Brunette:

Pixiwoo are always using it. I’ve read and heard about it on almost all the existing social newtorks, so I said to myself: why not?

My eyebrows are my Achilles’ heel. When I was a teen I made a terrible mistake and overplucked them…15 years later I found myself with random shaped, thin eyebrows which will probably never go back. I have looked EVERYWHERE for a suitable product to cover them, and it seemed like my solution was MAC’s Gel Liner in Dipdown (genius solution, by the way).

I tried the browwiz today and I am not 100% satisfied with the results. Not because of the quality of it, but because of the nature of my eyebrows. They are probably too sparse and thin. I seriously tried everything: gels, powders, pencils, eyeshadows. MAC gave me the best solution so far, even though I think Dipdown is a bit too warm compared to my dark brown roots. I think I still need some time to try and find a solution, tomorrow I will try a combination of both and see what happens then.

As soon as my other orders arrive I will post it on both Instagram and WordPress so feel free to have a look then!

Have a fantabulous week ahead and don’t be affected by Monday Blues, because Friday is always around the corner.

xoxo, -S.-